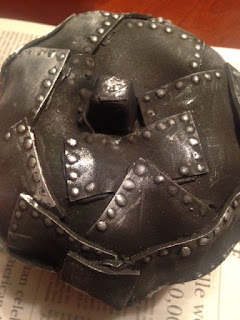
Here are the steps to make your own!
First: Gather the supplies!
Foam pumpkin from Dollar Tree. Foam strips that I picked up at the thrift store but you can find these at any craft store. Two part epoxy. Hot glue and hot glue gun. Black paint and paint brushes. Metallic Rub and Buff.
First off I started by cutting up the foam into random sized strips. Then I it was time to hot glue them to the pumpkin!
After each bit was hot glued then I started with the two part epoxy and made little rivets. Now this part was a bit of a pain as the epoxy gave me a lot of trouble. I think that just little drops of hot glue would have worked but then again it might have just been user error with the epoxy! Either way start going to town making rivets!
Next step was to paint it all black. You could have done any color really but I was going for a more silver/black theme with my pumpkin.
Now for the most fun part! Using metallic rub and buff I took a rag and started buffing the rub and buff all over the pumpkin. There were places I got a little heavy handed but you just have to keep working it until you get the look you are going for.
Once you are done you are left with an awesome Steam-pumpkin! This was a really fun project and I am looking forward to doing more like it very soon!
What do you think? Do you enjoy these type of DIY projects? Would you like to see more? Let me know in the comments below!


you are so crafty! i love seeing projects like this though i am not crafty or creative enough to do them myself. i love how you took a genre you love and turned into a pumpkin. fabulous!
ReplyDeleteThat is super cute! I just haven't been able to really get into the halloween spirit. I've planned our costume. I said I'd get the halloween lights out, but I've failed miserably and I always think of it when I'm not at home.. Then when I am at home the idea of pulling everything out of the storage area makes me immediately regret remembering.
ReplyDeleteThat is so cute! It really looks metal!
ReplyDelete